The Transparency Function
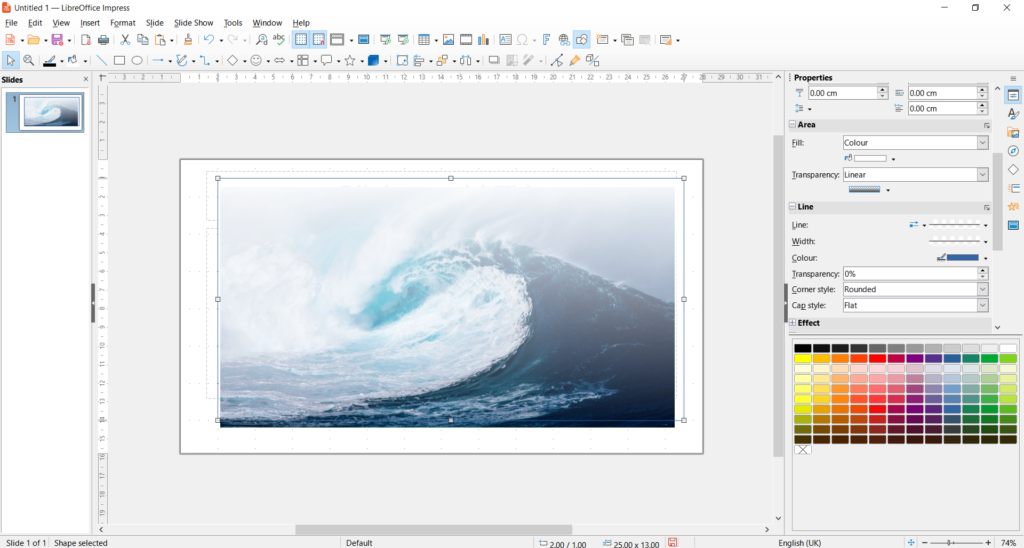
Another trick to add more oomph to the cover image or to create a color-neutral area for the title is the transparency function. This feature allows you to smoothly transition from an image to the background. In addition, you can use this function to soften the dominance of an image so that it can replace other elements such as e.g. does not dominate the title.
Again, you select an image for the background and drag it onto the slide. This time, position it in the middle of the foil with the edge up, down and to the side. Put the image in the background.
In the next step, create a rectangle again and position it over your image. Once you have selected the rectangle, a bar will open again on the right. Under the “Area” tab you will find the category “Filling”. Select white.


Just below that, you’ll find the “Transparency” category. The factory setting is “none”. In our case, we want transparency that becomes stronger towards the bottom. To do this, we select “linear”.
If we click on the box below, we can make further settings.
Increase the border value to 25% and adjust it to fit your image.
Finally, let’s stay in the right bar and scroll down to the “Line” category. Here we can create a border around our rectangle. For the “width”, choose 4.5 pt and the color black. If the image isn’t quite in the frame, resize it.
Insert a small rectangle again. Under “Area” – “Filling”, select black. Scroll down to “Line” and select black as the line color as well. Position and shrink the rectangle as shown in the image on the left.
Now you can add your headline. To do this, either go over the top bar (“Insert” – “Text field”) or press F2. Alternatively, you can of course use the existing text field. Make sure it’s in the foreground.

Congratulations
You’ve mastered a new feature!
